CFMOTO UFORCE 1000 Single APXUpdated 6 months ago
Please read the below Important Information relating to Safety & Fuel Tuning by clicking on the text below.
Important Information - Safety
WARNING: Before starting the installation of any ATV, UTV, or SXS aftermarket parts, it is important to prioritize safety. Make sure you are using suitable protective gear, this includes but is not limited to safety goggles, gloves and protective clothing.
Ensure your vehicle is on flat, stable ground. Installing parts on uneven or unstable surfaces can potentially lead to injury or damage to the vehicle. The vehicle should be turned off and cooled down before proceeding with the installation. Attempting to install parts on a running or hot vehicle can result in burns or other serious injuries.
After completing installation, it is important to inspect and check the tightness of any and all nuts, screws, and bolts. Failure to properly secure these fasteners can lead to component failure or detachment during riding, posing significant safety risks to both the rider and bystanders. The vehicle should be warmed up and subsequently cooled down to account for any thermal expansion or contraction effects that may affect the tightness of the fasteners.
It is crucial to inspect and tighten screws and bolts as necessary after initial rides, as vibrations and stresses during operation can cause fasteners to loosen over time.
It is important to pay close attention to the condition of the exhaust system and undertake the necessary measures to maintain optimal performance. Failure to properly maintain the exhaust system can result in reduced engine performance and potential safety hazards. Remember to repack exhausts as necessary to ensure efficient exhaust flow and minimize any potential restrictions that could adversely affect performance.
Prior to starting the installation process, it is important to thoroughly read all provided instructions to familiarize yourself with the installation procedures and any specific requirements or precautions. Failure to follow the instructions could result in improper installation or component failure.
Please check your local laws and regulations governing the use of aftermarket parts on your vehicle. Failure to comply with these regulations can result in legal repercussions, fines, or other penalties. Therefore, it is important to research and understand the applicable laws and regulations before installing aftermarket parts on your vehicle. Always ensure that any modifications made to your vehicle comply with local regulations.
Please check and read the full Warranty Information that can be found at:
Important Information - Fuel Tuning
The use of an aftermarket performance exhaust requires a crucial step - EFI tuning. RJWC Powersports exhaust systems must be accompanied by a proper re-flashing or use of an EFI Tuner to prevent the engine from running lean, which can result in engine damage. To guarantee a correct air to fuel mixture, make sure to adhere to the manufacturer’s recommended settings for your fuel tuner.
Neglecting to properly tune the engine using an EFI tuner when using an RJWC Powersports exhaust will void the exhaust warranty. Any problems arising from the engine not running correctly, such as a lean condition or incorrect air/fuel ratio, will not be considered a valid warranty claim.
Please note that if your vehicle differs from the base model, additional modifications such as a different tune, turndown pipe, or other adjustments may be necessary to achieve a proper fit and optimal performance. All RJWC Powersports exhausts are designed and tested on stock-equipped vehicles.
Spark Arrestor & Shim Ring Installation
![]()
The Spark Arrestor and Shim Ring are not pre-installed, they can be found in the Hardware Kit.
To install the Spark Arrestor, start by removing the End Tip. Unscrew the four M6x20 Cylinder Screws in the End Tip to remove it.
There is a small circular groove in the End Cap, in this groove you need to place the Shim Ring first, then the Spark Arrestor.
With the Shim Ring and Spark Arrestor in place, reinstall the End Tip by screwing back in the M6x20 Cylinder Screws.
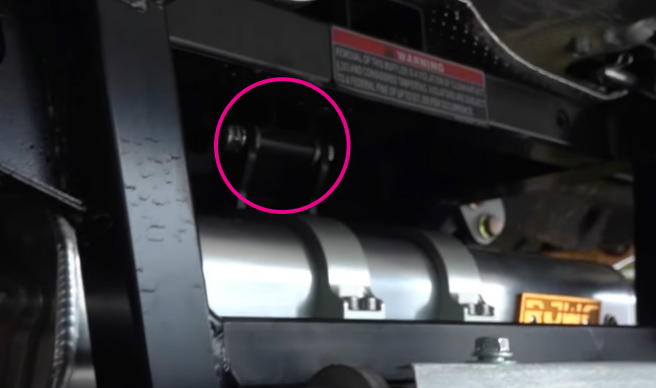
Removing the Stock Exhaust
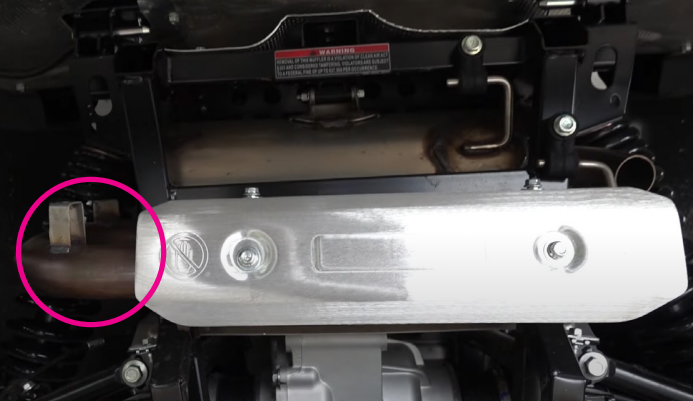
Remove the heatshield on the highlighted stock pipe, remove the bolts on the left flange where the pipe connects.
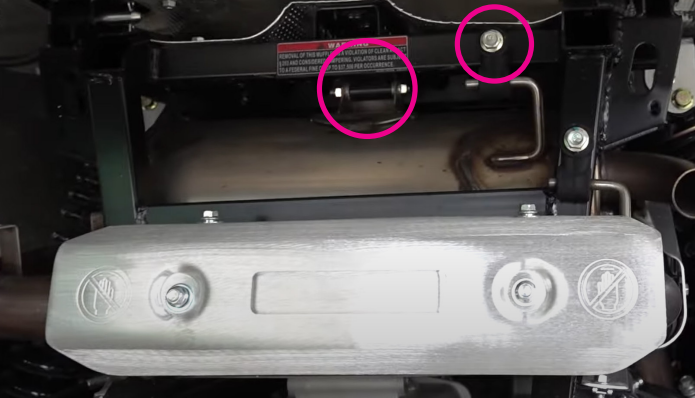
Remove the exhaust mount on the right side as shown in the image above. Loosen the bolts of the mounting bracket at the back of the exhaust to remove the stock exhaust.
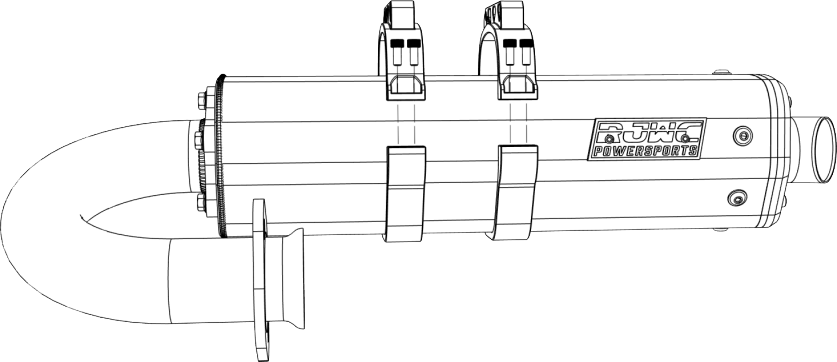
Installing the APX Exhaust
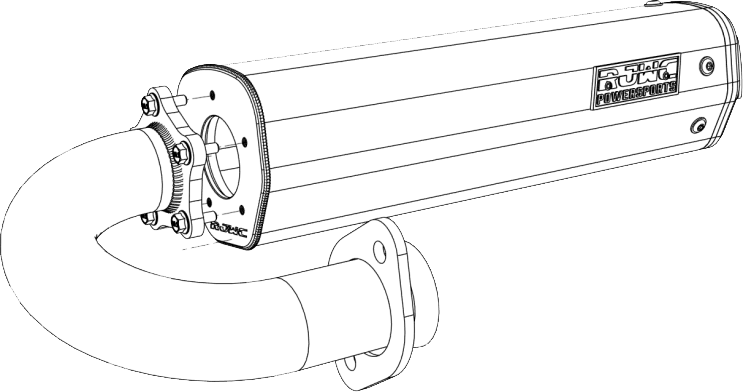
Place the G2 Gasket between the muffler and the pipe flange, lining up all five holes. Use 5x M5x60 Hex Flange Screws to secure them in place. The G2 Gasket should be tightly sandwiched between the flange and the muffler.
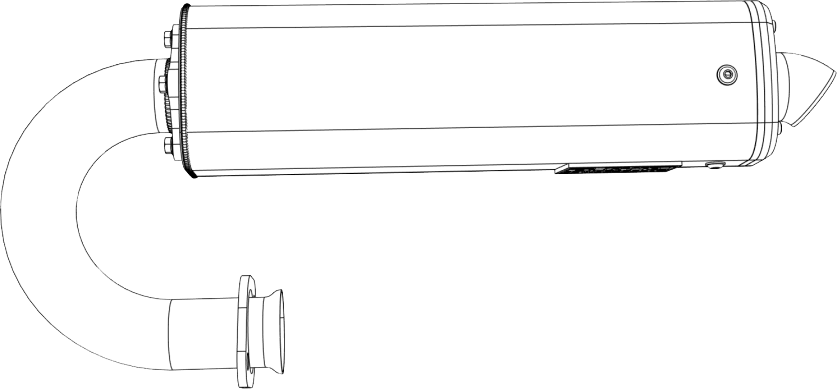
Use the above image to help with the placement of the pipe for installation.
Place the 2x Top Clamps and 2x Bottom Clamps around the muffler, using 8x M5x16 Cylinder Screws and 8x M5 A2 Washers.
Do not tighten the clamps fully, as they may need to be adjusted when mounting the muffler.
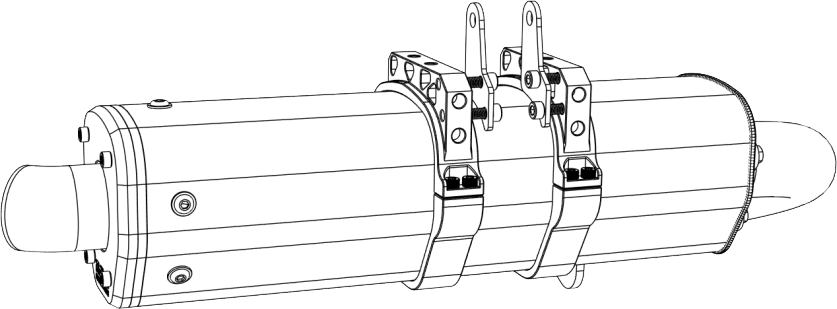
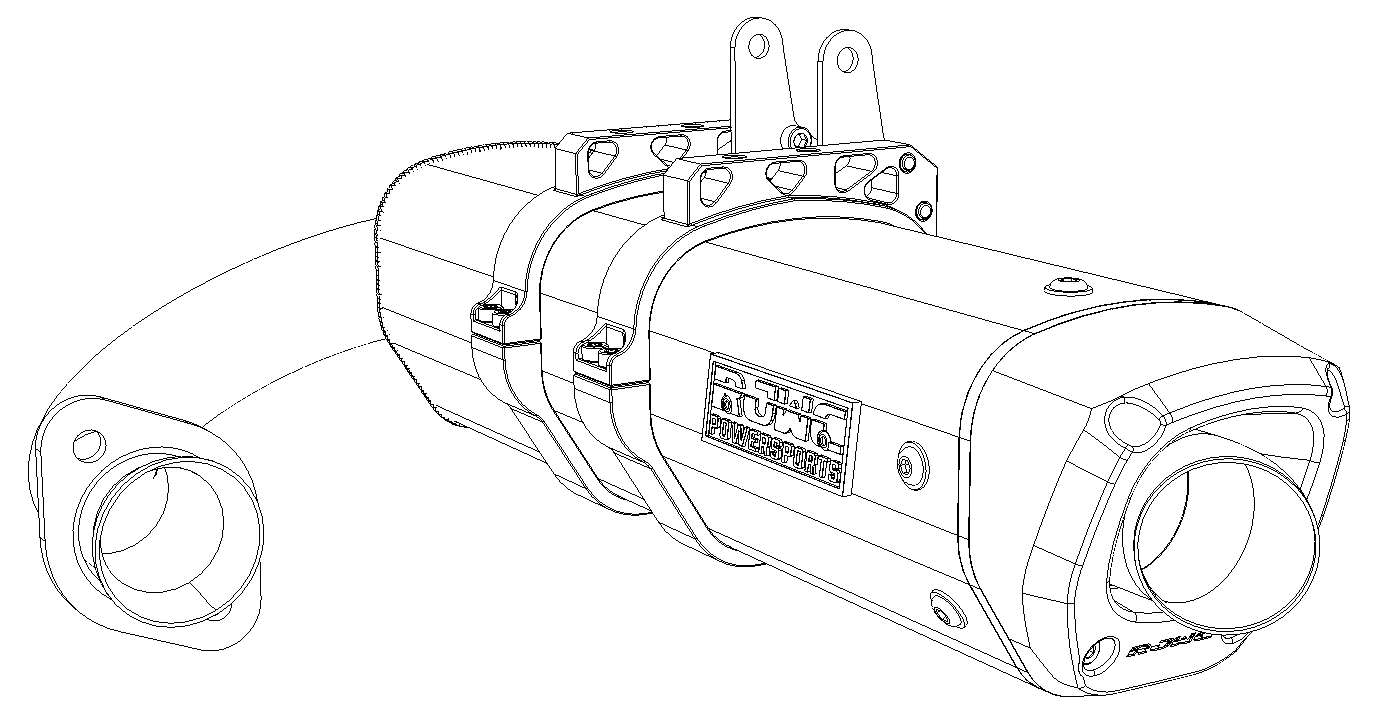
Install the 2x Mounting Brackets onto the top clamp as shown in the image. use 4x M6x16 Cylinder Screws.
These screws can be tightened fully.
We recommend having a second set of hands for this step to help hold the muffler in place.
Re-use the stock bolt and nut to mount the exhaust to the rear exhaust mount.

Insert 1x *.4 Washer onto each 1x M8x60 Hexagon Screw. Re-use the stock springs and use these to secure the pipe flange.
With the muffler mounted and the pipe connected, fully tighten the 8x M5x16 Cylinder Screws on the two Upper and Lower Brackets.
Double check all other screws and bolts and tighten them fully.
With the exhaust mounted you need to tighten all screws in place. You should start your vehicle, allow the exhaust to get warm and shut the machine down to cool. When it is cool, double check all screws and bolts and retighten them.
After your first ride, double check all screws and bolts and retighten.
You have now completed the installation of the CFMOTO UFORCE 1000 Single APX.
If you have any questions, or need any help please send an email to [email protected]