EFI Tuner User ManualUpdated 6 months ago
How to install
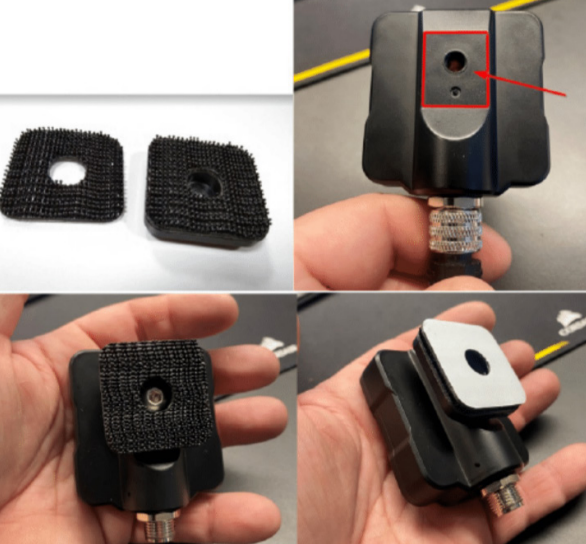
Install the plastic bracket with 3M Velcro on the backside of the tuner, the opposite Velcro on the vehicle where you will install the tuner. Install the tuner on a spot where you won’t risk damaging it.
Check our Online Manuals to find the Installation Manual for your make and model of vehicle.
Note - the 1/4 thread in the tuner works with the majority of popular camera brackets on the market.
Every tuner unit comes set to zero % gain in fuel, which means that the tuner is just transmitting the factory signals from the ECU to the injectors.
The cable harness for the vehicle you have comes with the recommended baseline settings for your unit. These settings are Dyno and AFR tested, but each vehicle and fuel quality is different, so make sure to check the AFR readings on your vehicle to ensure it is running properly.
Vehicles with lambda do control a part of the RPM range by trying to reach lambda 1.0, however - the tuner will take care of the part where the lambda is not adjusting the AFR.
Note: One very important thing is to have the black ground cable from the harness directly on the battery ground connector. Route the cables in a good way, to avoid any moving parts - and do not install the tuner on areas that will become hot.
Each Tuner comes with recommended settings for Stage 1 upgrades. If you have other upgrades like new cams, big bore kits, etc., it will need a custom tune. Our tuner can handle gains up to 25% more fuel over the entire RPM range.
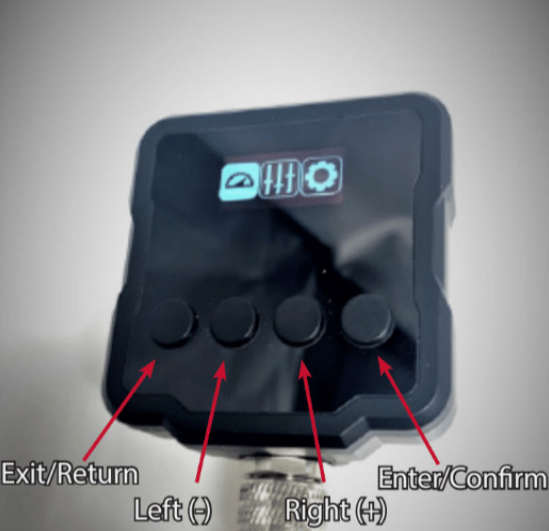
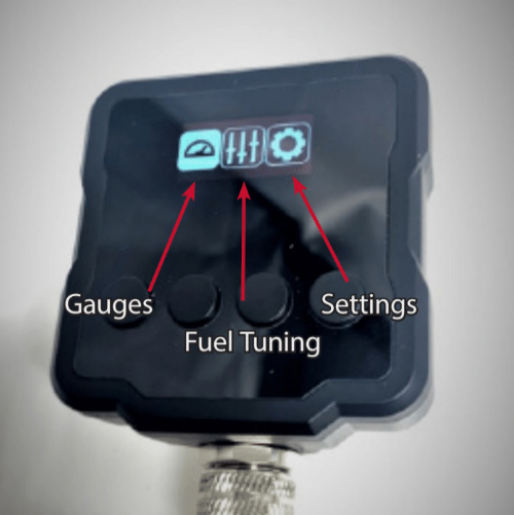
See the picture to the right for button functions.
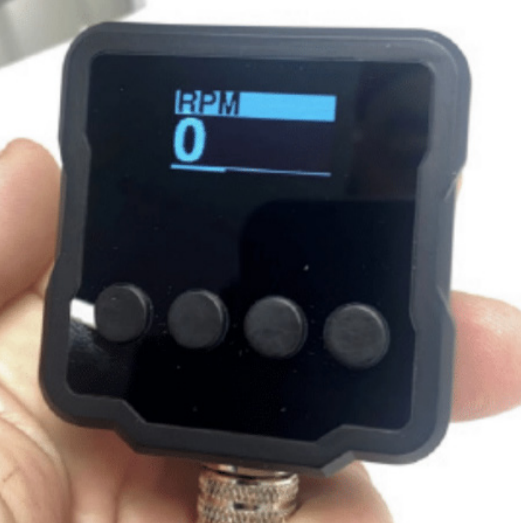
When the tuner starts, the RJWC logo will show on the display. It will shortly change display to the RPM gauge.
To enter Settings Mode, click on the exit mode button. The display will then show 3 different icons.
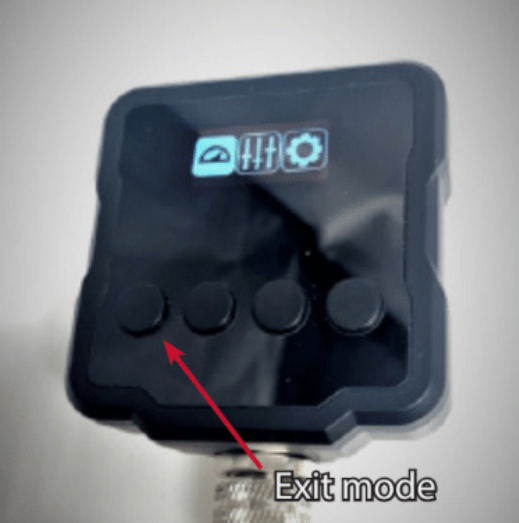
The 3 different functions: Gauges show RPM, the % gain on fuel and battery voltage and RPM scale.
Change settings of the fuel gain
Go to Fuel Tuning, and you have the 8 different stacks to choose from (1000-9000RPM). If you bush the right or left button, you will see that you jump from one RPM to another. If you, for example start with 1000RPM, click on it and push enter. You can now see that it chooses that stack to change and a small symbol will appear in the bottom of the stack.
See the picture below:
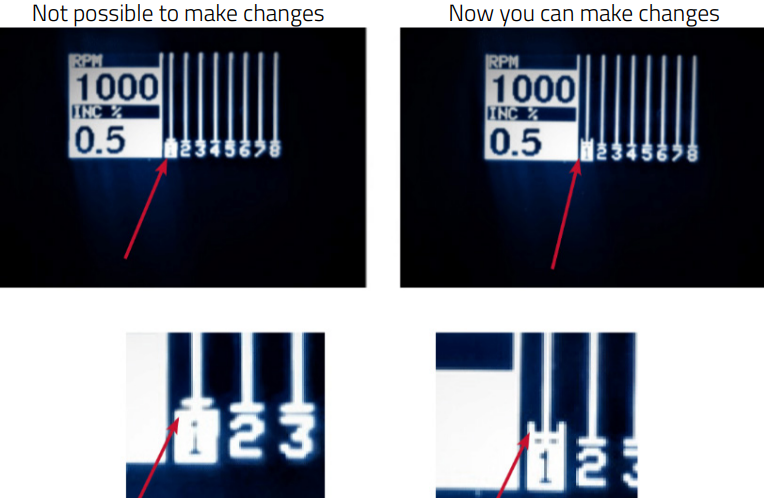
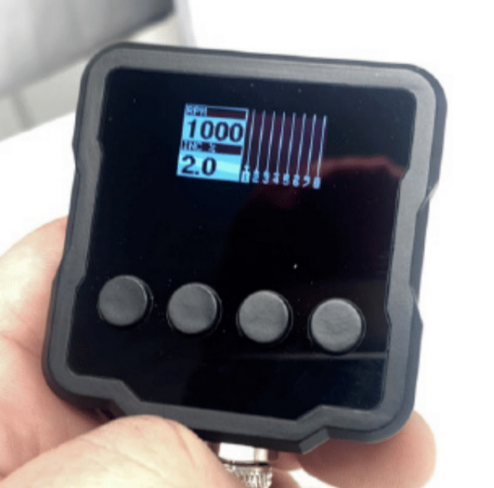
You can now increase the fuel % gain on that stack by clicking the right ‘+’ button. When you have gained the fuel you want, just click ENTER to save it and move to the next. The procedure is then the same on every stack up to 8000RPM.
Below is a picture that shows the fuel settings and the 8 different stacks. The picture below is an example showing a 2% gain on 1000RPM.
To find the installation and settings for your vehicle, please visit our EFI Tuner Manual Page